Sunday, December 12, 2010
Here's my second set of Christmas cards (and my main one, that little deer is the theme this Christmas).
All of the cuts came from the Create a Critter Cartridge. The Season's Greeting Sentiment is from the Seasonal stamp set from Papertrey Ink and I used Tim Holtz distressed ink in red brick. One thing I must say I'm grateful for is that I have the stamp-of-a-ma-jig since I am terrible at aligning my stamps! For the first dozen or so cards I made I heat embossed the lightbulbs to give it sparkle, but it was inconsistent as far as thickness and would stain a bit. I went and purchased some glossy accents and it worked BEAUTIFULLY (oh Glossy Accents, why did I not purchase you before?!) I'm sorry I do not have a picture of the new and improved holiday lights!
Here's the inside sentiment and the corresponding envelope I made. I must say, I wouldn't be able to make my envelopes without the envelope guideline from Scor-Pal. That is a lifesaver!
Thursday, December 9, 2010
Here's my first set of Christmas cards. Ahh the craziness of the holidays! So this year, I've decided to make two different card sets. Today, I'm showing the first design. I'll tell you, next year, I'm going to start much much earlier! It's tough to mass produced cards when you work 10 hour days!
So this is my "elegant" and simple card. I used the Christmas and Joys of the Season cartridge for the deer and the tree. My cricut was being temperamental and I was only able to cut out 8 or so trees completely with no snags or tears. I popped the deers on top of the tree, and added adhesive pears (that I colored red with copics) to the tree. The background was cuttlebugged using the swissdots folder.
The inside sentiment came from my Christmas stamp set from papertrey inks, and I made matching envelopes with my Martha Stewart scorboard. The lining was some patterned paper I picked up and I cuttlebugged the top of the envelope with swiss dots as well to tie it all in together.
Wednesday, November 24, 2010
My last birthday card for the month! This card is for my older brother. He's an avid White Sox fan so I decided to make him a card based off of that! I found the logo online and converted the .jpg file into an .svg file. I converted it into 3 cuts and cuts them out on Sure Cuts A Lot. The happy birthday was also cut using Sure Cuts A Lot and shadowed as well.
The inside sentiment was printed on a piece of designer paper found at Hobby Lobby. The second sox logo was also a .jpg converted to an .svg file and cut out with sure cuts a lot. I don't know what I'd do without that program!
Friday, November 19, 2010
A card for my older sister for her birthday! Nice and very simple, just to highlight the sheet music paper I picked up in a scrapbooking store in my travels. The sentiment is printed onto kraft paper, and I just lightly stamped the paper with metallic inks from the Martha Stewart teardrop ink pads. I added brads and that's it!
I made the envelope using my Martha Stewart scorboard and lined the inside with the same paper. Nice elegant card for my older sister.
Wednesday, November 10, 2010
Quick card for my brother-in-law for his birthday! I have a lot of birthday's coming up this month so I have to get cracking on the card making! The cake is cut from the Smiley "cartridge". The Smiley cartridge was a special download for the Gypsy, and it has a ton of really really cute cuts. I made him a red velvet cake with white frosting since it's his favorite and the sentiment was printed from the computer. Nice simple card with some stickles on the flame.
The cardstock for the base was using the charcoal cardstock from Papertrey Ink that I just purchased. It's so lovely as a base since it's so heavy, I'm so glad I purchased it (in black and white as well)!
Friday, October 29, 2010
I don't care what anyone says, when you're in the baseball world, wedding season is not in the summer, it's between late October and January. The reason why is because baseball season is during the summer, and when your husband has a baseball game every single day (literally, one off day per 28-31 days!), there's really no time to have a wedding or honeymoon! So the couple who I made the engagement card for awhile back (Jay, Topher's teammate and his fiancee Jenny) just got married up in Washington, and we made them a congratulations card using their wedding colors. The stamp is a digital stamp from The Greeting Farm collection, the heart and just married sign are from the Sweethearts cartridge.
I used the Martha Stewart scor-board to give a subtle border to the card as well as made a envelope for it. For the envelope I just used regular white cardstock and patterned paper from Hobby Lobby.
I colored the background behind the couple with a pale pale pink copic (I believe it was 000) and popped the flower in her hair. I outlined her wedding dress with stickles to give it some sparkly (when I make a card for a girl I jump at the chance to use stickles!). The couple are very blonde blonde, (her moreso then him) so I decided to color them in to reflect that.
I printed a sentiment on red cardstock using my computer and glued it to the inside. The lentils comment is because their hometown is known for Lentils! Hope you enjoyed this card as much as I enjoyed making it! Here's a picture of the beautiful couple!
The Brossmans
Love the Red Shoes and Cleats!!
Wednesday, October 20, 2010
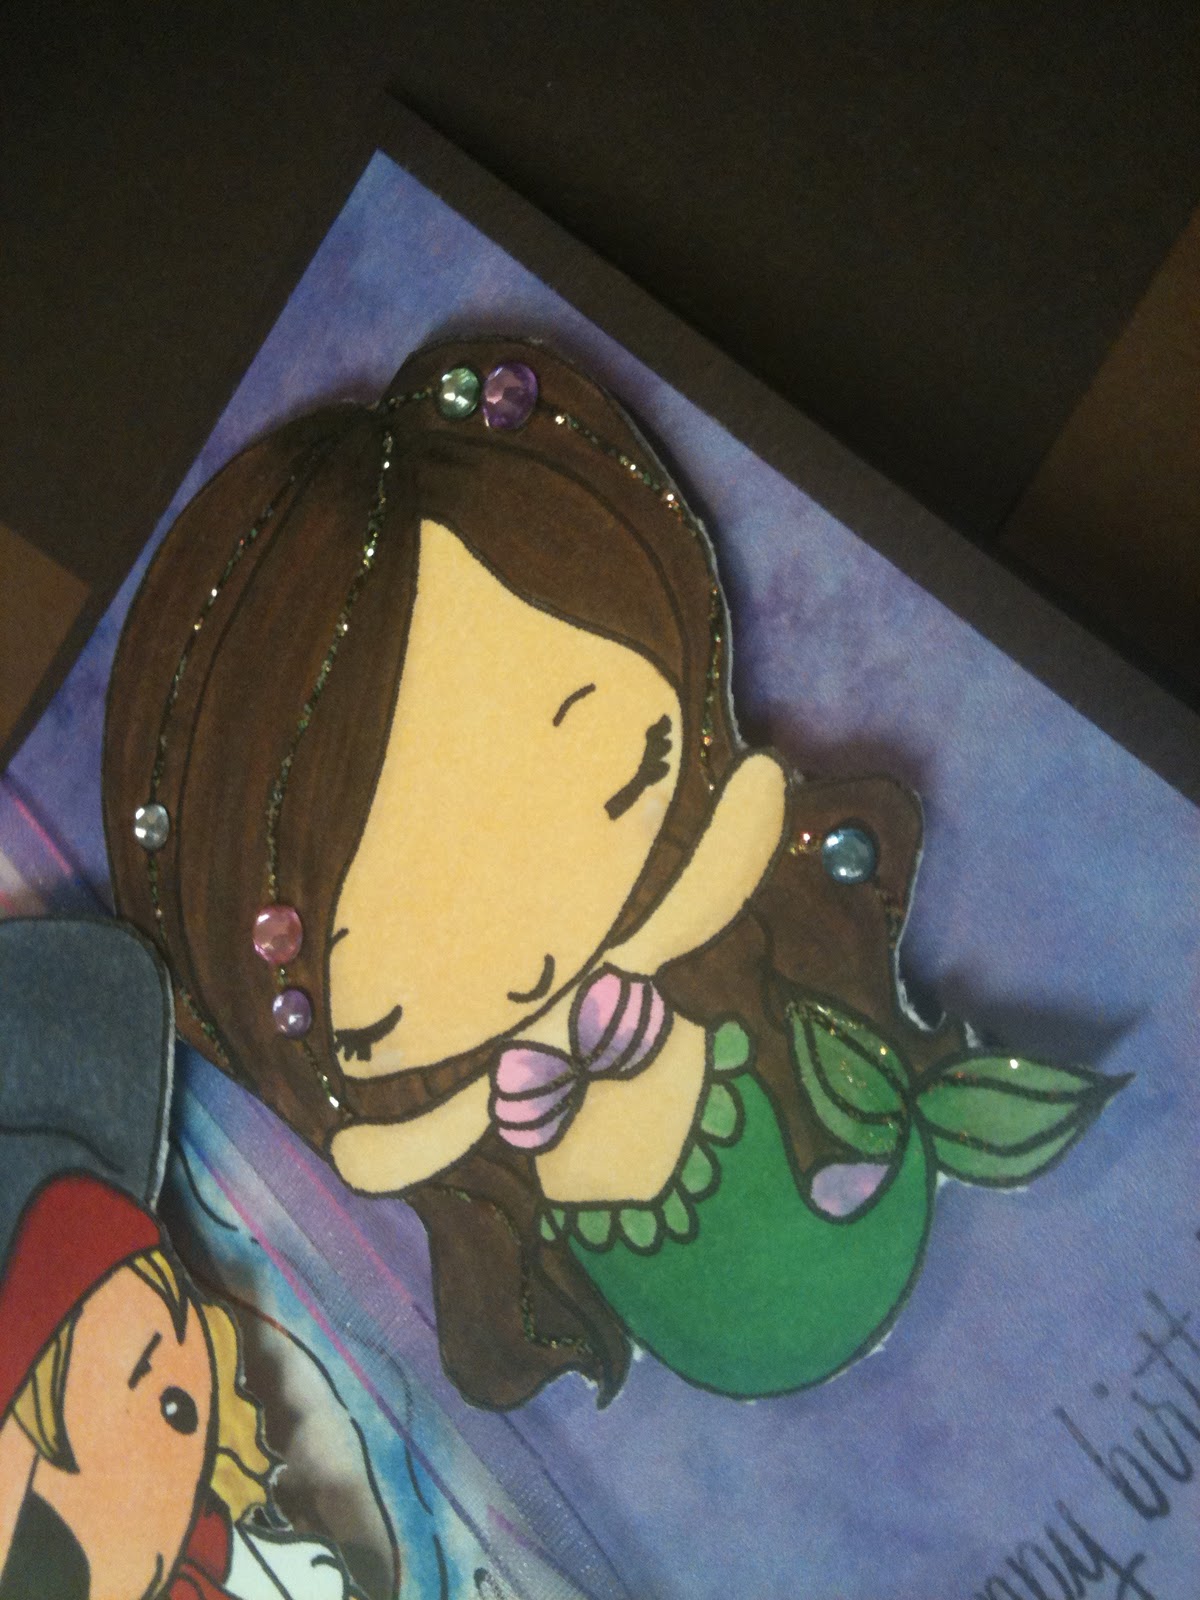
Birthday for my niece who turned 6! She lives in San Diego and had a pirate mermaid party so I decided to make her card with that theme. The stamps are from The Greeting Farm, Pirate Ian and Mermaid Anya. I colored them in with Copics and popped dotted them up on two backgrounds that were digital papers that I don't remember where I got it from. I did a terrible job stamping happy birthday and the ribbon was plain white ribbon that I colored with Copics to match the paper.
Each of the stamps were fussy cut after I colored them. I colored the mermaid's hair to mimic my niece's hair and I stickled some strands of gold and added adhesive gems where the pearls were to give it some interest. I stickled her shells and her tail to add more sparkly since every little girl loves glitter!
Here's he birthday girl with her cake!
Subscribe to:
Posts (Atom)